Your child will enjoy making this quick and easy pinwheel. A fun summer craft that will only take a few minutes to make and provides an excellent art project for your children to be proud of.
Supplies you will need:
- Two sheets of paper with different colors.
- Ruler.
- Scissors.
- Paper fastener (Optional - Pin if you don't want to make a pinless pinwheel).
- Drinking straw or wooden stick.
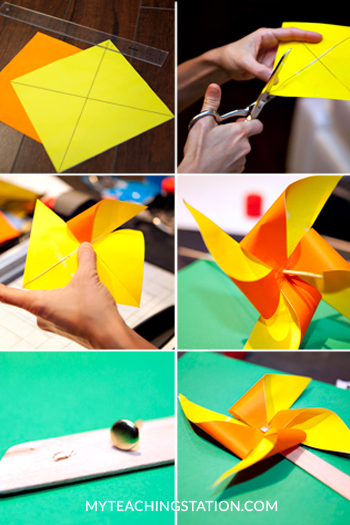
Directions:
- Cut out a 6 by 6 inch square (you can make the square larger or smaller)

- If using a second sheet of paper, cut out the same size square and glue the 2 papers together back to back.
- Use a ruler to trace a line from corner to corner.
- Make a mark on each line 1/3 away from the center.
- Cut along the lines you traced until you reach the 1/3 mark.

- Bring the edges to the center of the square.

- Make a hole through all 4 edges in the center.

- Make a small cut into the wooden stick to allow the paper fastener through.

- Stick the paper fastener (or pin) into a wooden stick or the paper fastener into the straw.

- Play!